Sunday, October 11, 2020

The Most Delicious Smoked Pulled Pork (Family Favorite)

I love smoked food, but I especially love when my husband and I work together as a team to make a great meal. Originally this recipe was inspired by an episode of America's Test Kitchen on PBS, as you can see in our original post Lexington-style pulled pork meal. We have since tweaked the original recipe as it was almost too spicy for the sensitive taste buds in our family. This recipe below is our tried and true, one we have been using for many years.This meat has so much flavor. We never feel the need to make the barbecue sauce in our old blog post or add barbecue sauce of any kind because it is just that good.

To prepare for the smoking process, I thawed a 6-8lb Boston butt pork shoulder roast. It would probably be a good idea to take it from the freezer a couple of days before smoking to allow time for the roast to thaw.

The rub recipe from America's Test Kitchen called for 2TBSP sweet paprika, 2TBSP kosher salt, 2TBSP ground black pepper, and 2TBSP brown sugar. Unless I am baking, I never really follow a recipe exactly, so I changed it a little bit by adding 1TBSP garlic powder, 1/2 TBSP cayenne pepper, and an additional 1TBSP of brown sugar. Instead of using sweet paprika, we use smoked paprika, which adds a delicious smoky depth to the flavor of the meat.

Once all the ingredients are measured, stir the seasonings together and rub all over that meat. Give it a good massage! Allow the meat to rest with the rub on it anywhere from 15 minutes to 24 hours. We wrap the roast in aluminum foil and place on a large plate in the fridge for several hours.


Since the last blog post for this recipe, we have upgraded from smoking the roast on our Weber Charcoal grill to my husband's "Ugly Barrel Smoker", a homemade smoker made from a large metal food grade barrel. If you are not familiar with one of these, there are several YouTube tutorials that walk you through step by step process of building one. To monitor the temperature during the smoking process, my husband purchased this wireless temperature probe from Amazon that not only monitors the internal temperature of the meat, but the internal temperature of the smoker without even having to step outside.
 

The smells from the Ugly Barrel Smoker on our patio are intoxicating at this moment. Yummmm! The flavored wood chunks are placed in a metal basket in the barrel separate from the coals. Our favorite flavors for smoking are mesquite and hickory. Today's flavor, hickory it is!

After smoking for 8 to 10 hours and maintaining the temperature of the smoker between 220 to 250 degrees, we removed the roast from the smoker once it reached an internal temperature of 165 degrees Fahrenheit. Next, we transferred the roast to an aluminum disposable pan, covered tightly with a double layer of aluminum foil, and placed in the oven for 2 more hours at 375 degrees Fahrenheit until the internal temperature of the roast reaches 205. This allows for the fat to render to create the most delicious, flavorful, and tender roast. 

After removing from the oven, we let it rest for 30 minutes. Remove the fat cap and set aside, then, shred the meat and discard any large hunks of fat or gristle. We reserved some of the meat, placed 1lb in freezer bags, to save for tacos or sandwiches another day. 

We hope your family enjoys this recipe as much as we do. Although labor intensive, there is enough delicious and savory meat leftover for several meals.

Rub Recipe:
2 TBSP Smoked Paprika
2 TBSP Kosher Salt
2 TBSP Black Pepper
3 TBSP Brown Sugar
1 TBSP Garlic Powder
1/2 TBSP Cayenne Pepper

Saturday, May 16, 2015

Whole Wheat Waffle recipe and the search for a great waffle iron

Our waffle iron, a Mother's Day gift from many years ago, finally died. Unfortunately, the Teflon started to flake off into our waffles. This made me very sad, so we are on the search for a new waffle iron, a massive iron that can handle frequent use and many mouths to feed (We are a family of six now). Any suggestions would be greatly appreciated in the comment section below.  This recipe also almost fits right in with our diet, "The Harcombe Diet" (except for the eggs, still working on that one).
Ingredients:
4 Cups Whole Wheat Pastry flour
2 TBSP Baking powder
2 tsp Sea Salt
4 eggs, separated
4 TBSP olive oil
4 TBSP Greek Yogurt
1 TBSP vanilla extract
4 Cups Skim Milk

Combine dry ingredients in a large bowl.

In a separate bowl, blend together milk, oil, yogurt and egg yolks.

Add liquid ingredients to dry ingredients, and blend. Beat the egg whites until stiff.

Fold gently into batter.

Bake in a hot waffle iron until brown or unlike us, if you are without a waffle iron, a frying pan works just as well.

Instead of syrup, I heat 2 cups frozen blueberries and 1/2 unsweetened applesauce in a saucepan to make a sauce to pour over waffles. Other ideas for waffle or even pancake toppings that my family loves are no sugar jam or jelly, flavored Greek yogurt, or organic maple syrup.

Saturday, May 9, 2015

Healthy Whole Wheat Pancakes

Ingredients:

4 c. whole wheat pastry flour
3 1/2 c. milk
3/4 c. extra virgin olive oil
3/4 c. flavored Greek yogurt or 3/4 c. apple sauce
3 1/2 c. milk
4 TBSP baking powder
2 Tsp salt
6 eggs

Directions:
Blend whole wheat pastry flour and milk with beater for 4 minutes and then add all the other ingredients and blend 4 more minutes.

Let the batter sit for 2 minutes. Pour on hot griddle. Batter will keep in refrigerator for 1 week. May need to thin with a little milk.


Thursday, April 16, 2015

Chicken Nuggets, a Family Favorite

It's not often that my children enjoy a meal of chicken nuggets. It's not by their choice, but by my choice. No matter how great the convenience of purchasing processed chicken nuggets in the bag, I find the unreadable ingredient list and unnecessary ingredient items a major reason for not purchasing my chicken nuggets from the frozen food section. I instead make my family's chicken nuggets from scratch and to be honest, I find the recipe easy. I don't really measure, just a shake from the seasoning container, so a tablespoon in the in the ingredient list is approximate.

Ingredients:
2 lbs local or organic boneless skinless chicken breasts
1-2 eggs
2 TBSP milk
2 cups whole-wheat breadcrumbs
1 TBSP paprika
1/2 TBSP garlic powder
1 TBSP onion powder
1 teaspoon Italian seasoning
Salt and pepper to taste
Cooking oil


Preheat the oven to 350 degrees Fahrenheit. Next, I make a bread crumb coating from homemade croutons using a three day old loaf of whole wheat bread.  Add the croutons to a food processor. Then, add the paprika, garlic powder, onion powder, Italian seasoning, salt and pepper. Pulse until the croutons are finely chopped.


Cut approximately three chicken breasts into small one inch pieces. Line a baking sheet with aluminum foil and spray with non stick cook spray.


I use two small bowls for dreading and breading the chicken. One bowl has two eggs slightly beaten with milk. The second bowls has the processed breadcrumbs with seasonings.  I throw four or five pieces of chicken into the egg mixture, then drain and add to the breadcrumbs. Make sure the chicken is coated evenly and place on the aluminum foil covered cookie sheet.


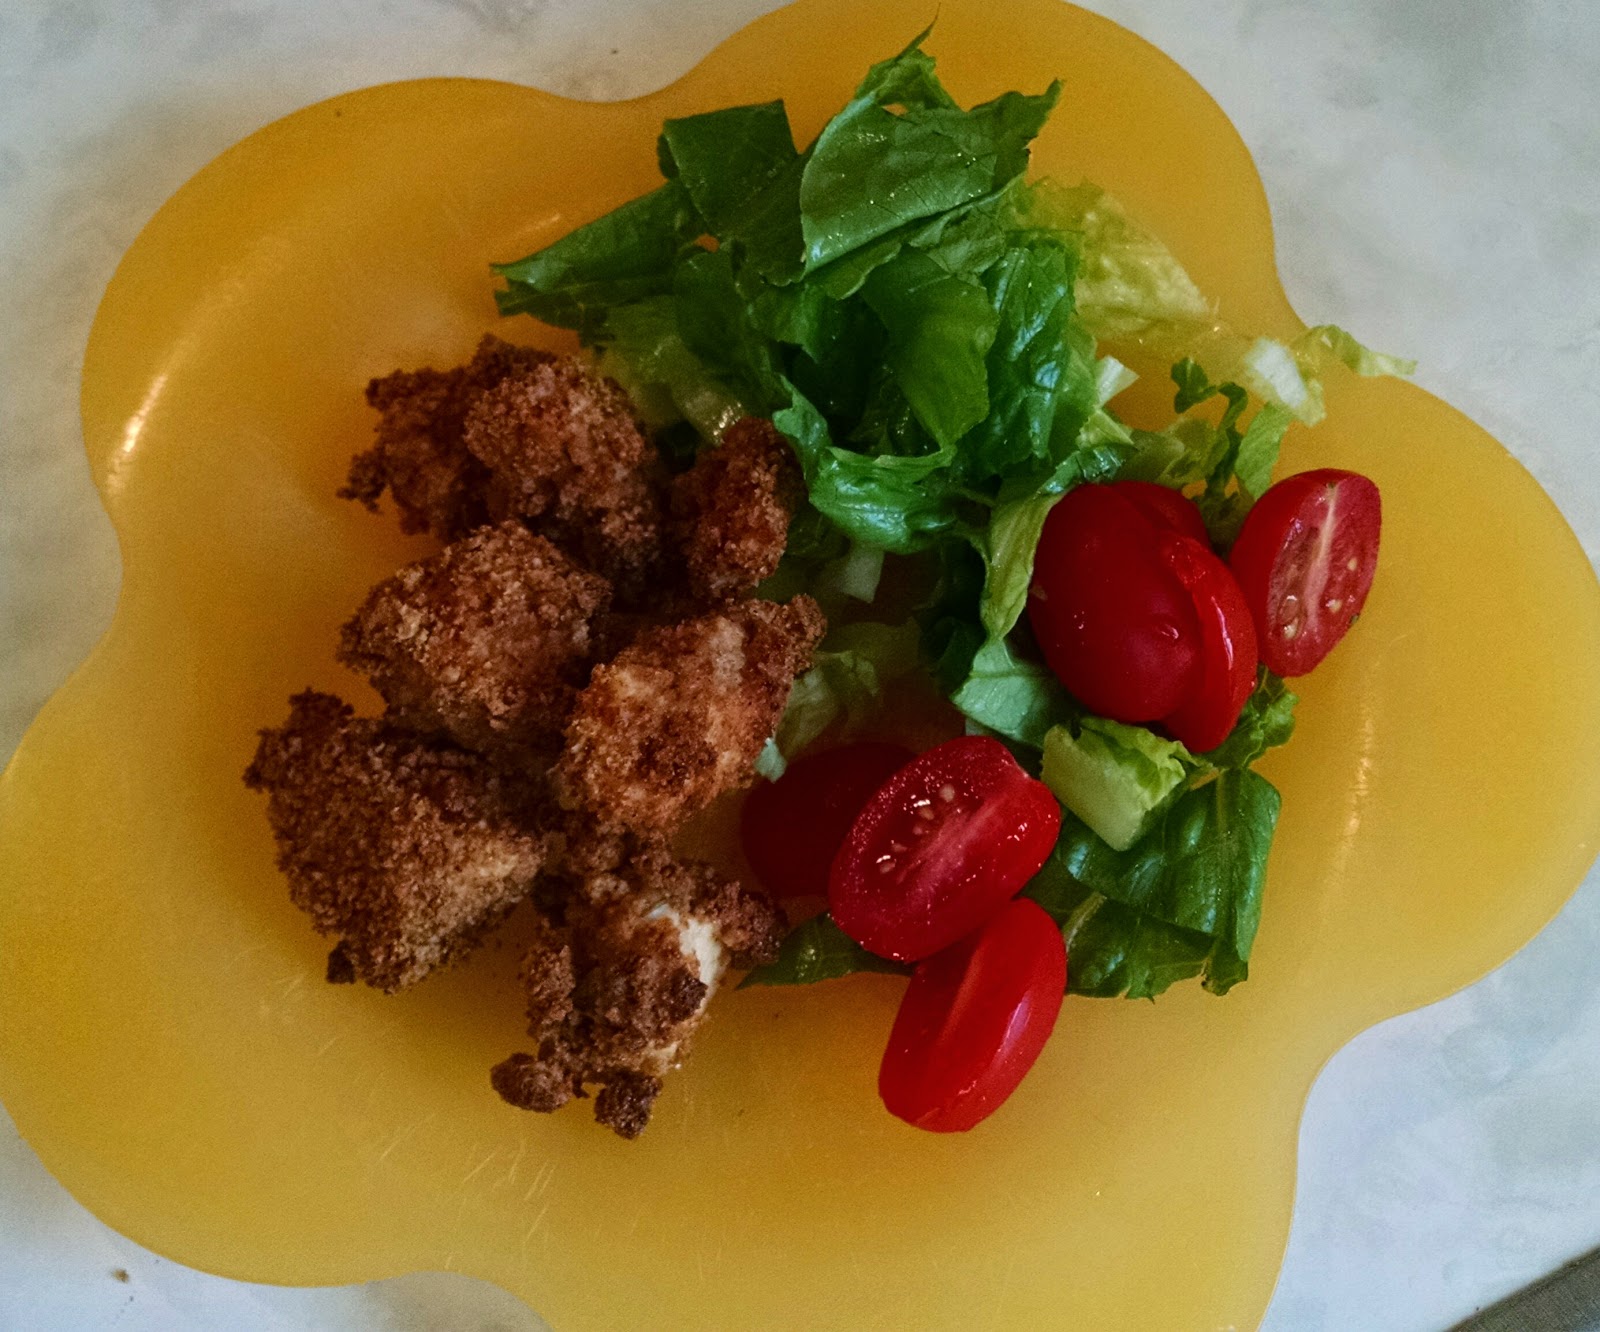
Bake in the oven for approximately 20 minutes until done completely through. We served with a romaine lettuce salad and ranch or barbeque sauce.


Sunday, April 12, 2015

Blueberry Corn Griddle Cakes

For a slow weekend morning with lots more time to make a special breakfast for the kids, we are enjoying griddle cakes. I guess the best way to describe this special breakfast is to compare it to pancakes except with cornmeal. A healthy alternative to the over processed and over sugared pancakes of our previous diet. I must admit that this recipe is not mine originally, but a recipe from my favorite vegan cook Christina Pirella, from "Christina Cooks". I tweaked her recipe a little bit, so notice any notes for changes.

Ingredients:
1 1/2 cups whole wheat pastry flour (I wonder how this would taste with corn flour substituted for those with gluten allergies?)
1/2 cup yellow cornmeal
generous pinch sea salt
1 tsp baking powder
grated zest of 1 orange (original recipe calls for zest of 1 lemon)
1 tsp apple cider vinegar (Christina calls for brown rice vinegar, but currently not in my cupboards)
2 TBSP light olive oil
1 1/2 to 2 cups skim milk (Christina calls for 1-2 cups of vanilla soy milk)
1 1/2 cup frozen blueberries thawed and well drained (Christina calls for fresh blueberries, but right now out of season and very expensive)

Whisk together flour, cornmeal, salt, and baking powder.

Mix in lemon zest, rice vinegar, and 2 tablespoons oil. Slowly mix in milk to create a thin batter.  I like my batter thin rather than thick so I tend to add a little over 2 cups of milk.

This is after one cup of milk.
After 1 1/2 cups milk.
Zest of orange using a micro-planer.
The final step is to gently fold in the blueberries or your batter will turn blue. I did not drain the frozen blueberries, so as you can see from my photo, the batter is a little blue. Oh Well!


Lightly oil (with olive oil) a griddle or skillet and warm over medium heat. Spoon batter onto hot griddle to form 3 inch rounds and cook until golden. I like to use a soup ladle to scoop the batter into the pan.


Flip each pancake and cook until golden. Serve smothered in the applesauce/blueberry sauce or organic maple syrup. See recipe below for the sauce.


Sauce:
all natural applesauce 1-1/2 cup (I use homemade applesauce)
1 cup blueberries frozen
Cook over medium heat until heated through and saucy.

(Christina calls for Suzanne's Specialties Blueberry Rice Nectar, but of course this item is currently not available in my kitchen so I improvised with the above sauce.)

Wednesday, April 8, 2015

Healthy No Sugar Apple Chips

Wow! It has been an incredibly long time since I have posted to this blog and I am greatly sorry for not posting more regularly, especially with so many great recipes that I have found successful for my family in this long hiatus. I must admit that I have started a second blog related to my other love, teaching art to elementary children. My other blog, Artteacher101.blogspot.com, has kept me very busy this year and made me a slacker at this blog, but my goal this spring is to post regularly on this site (weekly if possible) any new, successful, healthy, recipes that my family enjoys! So, here is one that I have been making for years and my kids love it; Apple Chips! This simple recipe can be stored for up to six months and worked great for the incredibly large apple harvest from my parent's farm.

The very first step is to peel and core the apples. My kids love to eat the shavings like a natural fruit by the foot, less sugar than any you can buy in the store and no pesticides to worry about!

An apple corer works best on firm apples. Apples that are overly ripe and soft will just fall apart in the apple corer. My kids love to help with this step and of course, eat the skins as they work the machine (the original fruit by the foot).
After the apples are cored and skinned, I cut them in half and the apple easily separates into slices.

Once sliced and separated, I place the apples on the dehydrator's shelves in a single layer and sprinkle with cinnamon for extra flavor. No sugar needed! The natural juices of the apple make the apple chips plenty sweet when all complete.
I mostly use a dehydrator to make the chips. It's a hand me down from my mother. To be honest, I don't even know if they make this one anymore. Sometimes, in addition to the dehydrator, I have so many apples that I place the apples in a single layer on a cookie sheet with parchment paper (to prevent the chips from sticking to the cookie sheet) and set the oven to a low temp (250 degrees Fahrenheit) to dry out the slices. This usually takes a couple of hours depending on how juicy the apples. Sometimes using the oven is quicker and more efficient. When using the dehydrator, it can take up to two days almost to dry out the apples.
We love this sweet treat without any unnecessary sugar.  Have you and your family ever tried homemade apple chips? Let me know what you think.


Wednesday, March 19, 2014

Acorn Squash Low Carb Pizza Crust

Did I mention that my husband and kids (me included) love pizza! I am a carb junkie. My addiction includes breads and desserts, so I try to curb my carb cravings and at least try to reduce the amount of flour I consume.


In the last six months we have been ordering produce through Bountiful Baskets, a coop distribution of 50% fruit/50% vegetable baskets, organic produce baskets, artisan bread and sandwich bread every other week. The last week's basket was definitely bountiful and included three small acorn squashes. Instead of using sweet potatoes for a pizza crust (as we have tried in a previous post), the thought occurred to me...why not try squash and see what happens! I am hoping this experiment is a success as the crust is baking in the oven right now.

I must give credit for the inspiration of this recipe to Tina at Carrots N' Cake. I did make some modifications to her original recipe, so see the comments below. You can find my original sweet potato pizza crust recipe by clicking here.

Ingredients:
  • 2 cups acorn squash roasted (1 whole small acorn squash, skin and seeds removed)
  • 1/2 cup canned coconut milk (pureed in blender with acorn squash)
  • 1 3/4 cups whole wheat pastry flour
  • 2 large eggs
  • 1 tsp baking powder
  • 1 tsp minced fresh garlic
  • 1 tsp oregano
  • 1/2 tsp curry powder
  • 1/2 tsp paprika
  • dash of cinnamon
  • 1 tsp salt
  • Your choice of toppings
Directions:
The first step is to preheat your oven to 375 degrees F.  Next, I prepared the acorn squash for mashing by cutting it in half, placing it on a cookie sheet (cut sides up), drizzling with olive oil, seasoning with salt and pepper, and roasting in the oven at 350 degrees Fahrenheit until cooked through (about 30 minutes).  After the squash is cooled, I peeled it, scooped the seeds out, cut it into small chunks, and threw in the blender with a half cup coconut milk to puree. To be honest, I did this step one week ago and threw the acorn squash puree in the freezer.


Next, I combined all the ingredients listed above.  The original recipe called for almond flour.  It's not a staple in my pantry, so I replaced with whole wheat pastry flour instead. Those who suffer from gluten allergies could substitute with another kind of flour, such as almond or coconut flour.

The original recipe also called for garlic powder, although normally a pantry staple in my home, I was all out and did not feel like running to the store, so we used the fresh garlic we had on hand instead and grated with a micro-planer.


The original recipe also called for a pizza pan. Thanks to my wonderful MIL, I received one at Christmas. I covered it with olive oil and preheated it in the oven. I spread the dough onto the baking pan until about a 1/2 inch thick and baked for 25-30 minutes until center was firm and edges were lightly browned. Just an advanced warning, the dough will be sticky and goey and may be difficult to spread. I used a spatula to help spread the dough.


Next, we removed the crust from the oven, added toppings, and baked for another 5-7 minutes until the cheese was completely melted. My children's favorite topping of all time, "Epiphany" sausage! It is made by a local church as their annual fundraiser and is held every year on the 2nd Sunday in March. The entire parish works together to butcher 30 hogs and process their own sausage with seasonings and casings making the leanest most flavorful sausage I have ever tasted! This small town of 50 people will fill with 1000 to 1500 people in one day looking for a great meal that only happens one time a year!


UPDATE! The crust is awesome and so much better than the sweet potato pizza crust I posted earlier! My children will agree! THEY EVEN REQUESTED WE MAKE IT AGAIN SOON!